
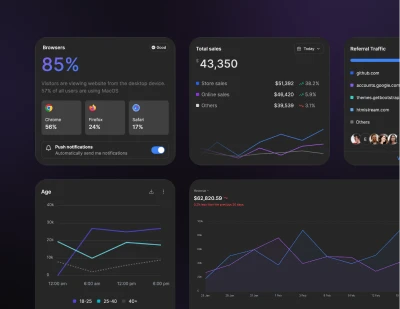
Install Preline UI with React + Vite using Tailwind CSS
Install Preline UI with Tailwind CSS in React + Vite projects, including JavaScript plugin setup, Vite configuration, app scripts, and optional dependencies.
Installation
Please note that the plugin has been tested with React 19.2.0 and Vite 7.3.1. The project was created using the npm create vite@latest <project name> -- --template react-ts command.
If you are using your own project structure or a different version, pay attention to the file paths and features of your version!
React + Vite quick setup
If Tailwind CSS is not set up yet, start with the official React + Vite Tailwind CSS guide first.
Some components rely on third-party libraries. The setup below assumes full use of Preline UI, including those optional dependencies. If you do not need those components, you can trim the related packages and configuration.
-
Install Preline UI
Install
prelineand React Router with your preferred package manager.Terminalnpm install preline react-routerPreline UI uses the Tailwind CSS Forms plugin across form components. If you have not added it yet, install it with
npm install -D @tailwindcss/forms.The complete optional-plugin example below also requires
jquery,datatables.net-dt,lodash,dropzone,nouislider, andvanilla-calendar-pro. Install only the libraries used by your components. TypeScript projects also need@types/jquery,@types/lodash, and@types/dropzone; the other packages ship their own declarations.Terminalnpm install jquery datatables.net-dt lodash dropzone nouislider vanilla-calendar-pro npm install -D @types/jquery @types/lodash @types/dropzone -
Include Preline CSS
Import Preline into your
index.cssfile, for exampleproject_root_directory/src/index.css.index.css@import "tailwindcss"; @import "preline/variants.css"; @source "../node_modules/preline/dist/*.js"; /* Optional Preline UI Datepicker plugin */ /* @import "preline/datepicker-styles-utility.css"; */ /* Plugins */ /* @plugin "@tailwindcss/forms"; */ @import "preline/theme.css"; /* Optional Preline UI Datatable Plugin: DataTables.net renders its own search/length/paging controls alongside Preline's own; hide the native ones since they can't be disabled through DataTables options alone. */ /* .dt-layout-row:has(.dt-search), .dt-layout-row:has(.dt-length), .dt-layout-row:has(.dt-paging) { display: none !important; } */See the Theme docs to learn more about Preline Themes.
-
Add type definitions for Preline
Create a
global.d.tsfile for the shared window typings, for exampleproject_root_directory/src/global.d.ts.global.d.tsimport type { JQueryStatic } from "jquery"; import type _ from "lodash"; import type Dropzone from "dropzone"; import type noUiSlider from "nouislider"; import type DataTable from "datatables.net-dt"; import type { Calendar } from "vanilla-calendar-pro"; declare global { interface Window { $: JQueryStatic jQuery: JQueryStatic _: typeof _ Dropzone: typeof Dropzone noUiSlider: typeof noUiSlider DataTable: typeof DataTable VanillaCalendarPro: typeof Calendar $hsFileUploadCollection?: Array<{ element: { destroy: () => void } }> } }; export {}; -
Add external libraries
Import and attach the required external libraries in a dedicated module, for example
project_root_directory/src/vendor-globals.ts. Preline checks whether optional plugins are available whenpreline/non-autoevaluates, so this module must be loaded first.vendor-globals.tsimport $ from "jquery"; import _ from "lodash"; import Dropzone from "dropzone"; import noUiSlider from "nouislider"; import DataTable from "datatables.net-dt"; import { Calendar } from "vanilla-calendar-pro"; window.$ = $; window.jQuery = $; window._ = _; window.Dropzone = Dropzone; window.noUiSlider = noUiSlider; window.DataTable = DataTable; window.VanillaCalendarPro = Calendar; -
Initialize Preline UI
Re-run Preline UI initialization after route changes from a component rendered inside your router, for example
project_root_directory/src/components/PrelineInit.tsx.PrelineInit.tsximport { useEffect } from 'react'; import { useLocation } from 'react-router'; function PrelineInit() { const { pathname } = useLocation(); useEffect(() => { let active = true; (async () => { await import('../vendor-globals'); const { HSStaticMethods } = await import('preline/non-auto'); if (!active) return; HSStaticMethods.cleanCollection(); HSStaticMethods.autoInit(); })().catch((error: unknown) => { console.error('Failed to initialize Preline UI', error); }); return () => { active = false; window.$hsFileUploadCollection?.forEach( ({ element }) => element.destroy() ); }; }, [pathname]); return null; } export default PrelineInit;Render
<PrelineInit />from the layout that contains your router's<Outlet />. This keeps the initializer mounted whilepathnamechanges and ensures each newly committed route is scanned.React Strict Mode runs an extra setup and cleanup cycle in development. Keep the cancellation guard and make cleanup mirror setup.
cleanCollection()only clears Preline registries; it does not call plugindestroy(). File Upload needs the explicit destroy step because Dropzone appends hidden inputs todocument.bodyoutside the routed React subtree.Restart the Vite development server after installing or changing browser dependencies. HMR does not refresh Vite's dependency optimizer, and stale optimized URLs can fail with
504 (Outdated Optimize Dep)until the server restarts.
Optional Preline UI styles
Preline UI ships with a small set of opinionated base styles that can be applied to components by default. If you want those defaults in your project, include them in your CSS. These styles shipped by default in Tailwind CSS v3, so they remain available as an optional layer in Preline UI.
                          /* Adds pointer cursor to buttons */
                          @layer base {
                            button:not(:disabled),
                            [role="button"]:not(:disabled) {
                              cursor: pointer;
                            }
                          }

                          /* Defaults hover styles on all devices */
                          @custom-variant hover (&:hover);
Specific guide
Continue with a focused guide for wiring Preline UI JavaScript plugins into this framework.