
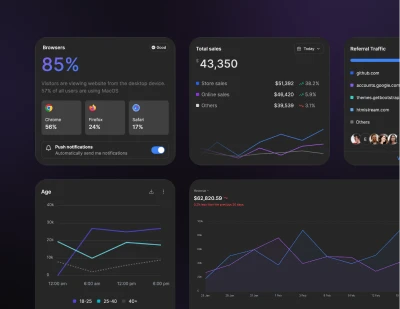
Install Preline UI with Svelte using Tailwind CSS
Install Preline UI with Tailwind CSS in Svelte projects, including JavaScript plugin setup, SvelteKit navigation, actions, and optional dependencies.
Installation
Please note that the plugin has been tested with the 5.0.0 version of the framework. The framework was installed using the standard npx sv create <project-name> command.
If you are using your own project structure or a different version, pay attention to the file paths and features of your version!
Svelte quick setup
If Tailwind CSS is not set up yet, start with the official SvelteKit + Tailwind CSS guide first.
Some components rely on third-party libraries. The setup below assumes full Preline UI usage with those dependencies preloaded. If you do not plan to use those components, you can remove the related libraries from your configuration.
-
Install Preline UI
Install
prelinewith your preferred package manager.Terminalnpm install preline -
Include Preline CSS
Import Preline into your project's Tailwind CSS entry file. If you scaffolded Tailwind with
npx sv add tailwindcss, that file isprojects_root_directory/src/routes/layout.css(imported once from the root+layout.svelte); if you added Tailwind manually via the SvelteKit + Tailwind CSS guide, it'sprojects_root_directory/src/app.cssinstead. The@sourcepath below is relative to that file's own location, so adjust the number of../segments to match how deep it actually sits from your project root. For example,src/routes/layout.cssneeds one more../thansrc/app.cssdoes.layout.css@import "tailwindcss"; @import "preline/variants.css"; @source "../../node_modules/preline/dist/*.js"; /* Optional Preline UI Datepicker Plugin */ /* @import "preline/datepicker-styles-utility.css"; */ /* Plugins */ /* @plugin "@tailwindcss/forms"; */ /* Preline Themes */ @import "preline/theme.css"; /* Optional Preline UI Datatable Plugin: DataTables.net renders its own search/length/paging controls alongside Preline's own; hide the native ones since they can't be disabled through DataTables options alone. */ /* .dt-layout-row:has(.dt-search), .dt-layout-row:has(.dt-length), .dt-layout-row:has(.dt-paging) { display: none !important; } */See the Theme docs to learn more about Preline Themes.
-
Declare and load optional plugin dependencies
HSStaticMethodsand every plugin class are already typed by the package itself underpreline/non-auto, so nothing needs to be declared for Preline UI directly. A handful of plugins depend on a third-party library that isn't bundled: Datatable needsjqueryanddatatables.net-dt, Datepicker needsvanilla-calendar-pro(andlodash), Range Slider needsnouislider, and File Upload needsdropzone. Only install and declare the ones the plugins you actually use need.Terminalnpm install jquery lodash nouislider dropzone datatables.net-dt vanilla-calendar-pro npm install -D @types/jquery @types/lodash @types/dropzonenouislider,datatables.net-dt, andvanilla-calendar-proship their own TypeScript types, so no@types/package is needed for those three. Put the imports, thedeclare globaltypings, and thewindowassignments in one module, for exampleprojects_root_directory/src/lib/vendor-globals.ts.vendor-globals.tsimport $ from "jquery"; import DataTable from "datatables.net-dt"; import _ from "lodash"; import { Calendar } from "vanilla-calendar-pro"; import noUiSlider from "nouislider"; import Dropzone from "dropzone"; declare global { interface Window { // Only declare the ones the plugins you actually use need $: typeof $; jQuery: typeof $; DataTable: typeof DataTable; _: typeof _; VanillaCalendarPro: typeof Calendar; noUiSlider: typeof noUiSlider; Dropzone: typeof Dropzone; } } window.$ = $; window.jQuery = $; window.DataTable = DataTable; window._ = _; window.VanillaCalendarPro = Calendar; window.noUiSlider = noUiSlider; window.Dropzone = Dropzone;This module has to finish running before Preline UI scans the page, or a plugin whose dependency check runs at that scan will silently no-op. The next step imports it first, then loads Preline UI.
-
Initialize Preline UI, and reinitialize on navigation
SvelteKit routes client-side by default, so a page load only happens once, and navigating between routes swaps the content inside your root layout without reloading the document. Run Preline UI's scan in
afterNavigate(from$app/navigation) inprojects_root_directory/src/routes/+layout.svelteinstead of a one-timeonMount: it fires on the initial load as well as every later navigation, so one hook covers both cases. Importvendor-globalsbeforepreline/non-autoso any optional dependency is onwindowbefore Preline UI's own dependency checks run. A navigation counter guards against a slower-resolving import from an earlier navigation landing after a newer one already finished, which would otherwise rerun the scan a second time and reset whatever the user is now looking at.+layout.svelte<script lang="ts"> import { afterNavigate } from "$app/navigation"; ... let navigationToken = 0; afterNavigate(async () => { const token = ++navigationToken; await import("$lib/vendor-globals"); const { HSStaticMethods } = await import("preline/non-auto"); if (token !== navigationToken) return; HSStaticMethods.cleanCollection(); HSStaticMethods.autoInit(); }); </script> ...
Optional Preline UI styles
Preline UI ships with a small set of opinionated base styles. If you want them in your project, add them to your CSS file. These defaults used to come bundled with Tailwind CSS v3, so they are still available as an optional layer in Preline UI.
                          /* Adds pointer cursor to buttons */
                          @layer base {
                            button:not(:disabled),
                            [role="button"]:not(:disabled) {
                              cursor: pointer;
                            }
                          }

                          /* Defaults hover styles on all devices */
                          @custom-variant hover (&:hover);
Hints and tips
When passing configuration through data attributes, wrap the object in curly braces and escape the quotes and slashes inside the string value.
Specific guide
Continue with a focused guide for wiring Preline UI JavaScript plugins into this framework.